Repairing Cracked or Damaged Paint on Vintage Signs
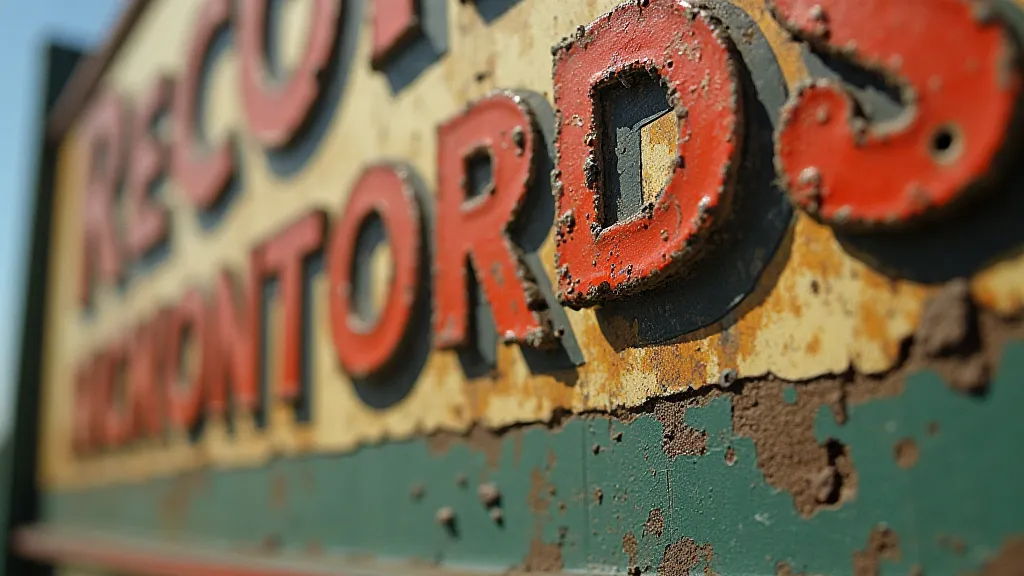
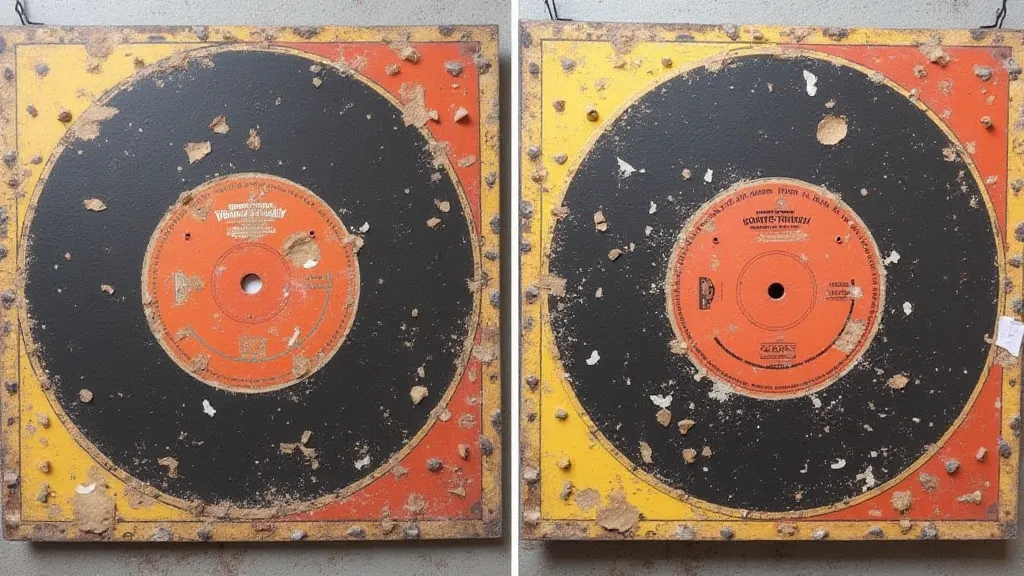
Vintage record store signs are more than just advertising; they’re vibrant pieces of music history. Their weathered appearance often tells a story of decades past, of bustling shops and the thrill of discovering new music. However, this very age often brings with it the challenge of damaged paint – chips, cracks, fading, and peeling – all threatening the sign's integrity and aesthetic value. Repairing these imperfections requires a delicate touch and a deep understanding of the restoration process. This guide will provide a comprehensive approach to repairing cracked or damaged paint on your vintage record store signs, focusing on techniques that preserve authenticity and enhance the sign’s charm.
Understanding the Damage & Materials
Before you begin any restoration work, it's crucial to properly assess the extent and nature of the damage. Different types of damage necessitate different approaches. Common problems include:
- Chips: These are localized areas of paint loss, often caused by impact or abrasion.
- Cracks: Can be hairline cracks in the paint layer or deeper cracks that extend through the entire sign. Temperature changes and age contribute significantly to cracking.
- Fading: Sun exposure and aging degrade pigments, causing the colors to fade over time.
- Peeling: Often caused by moisture intrusion or poor adhesion between paint layers.
- Rust (on metal signs): Requires addressing the underlying metal corrosion before any paint work can begin.
Materials You'sll Need:
- Cleaning Supplies: Mild soap, water, denatured alcohol, soft cloths.
- Solvents: Mineral spirits or paint thinner (use in a well-ventilated area).
- Putty Knife or Scraper: For carefully removing loose paint.
- Fine-Grit Sandpaper: (220, 400, 600 grit) – for smoothing edges and preparing surfaces.
- Primer: Compatible with the sign's original material (check manufacturer’s specifications).
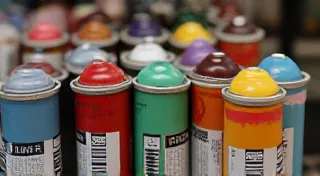
- Acrylic Paints or Automotive Touch-Up Paint: Choose colors that closely match the original. Automotive paints are often ideal due to their durability and color matching capabilities.
- Artist's Brushes: Various sizes for detailed work.
- Clear Coat (Optional): For added protection and gloss.
- Color Matching Tools (Optional): Color matching guides or software can aid in replicating the original hue.
Step-by-Step Repair Process
- Cleaning: Begin by thoroughly cleaning the sign's surface. Remove any dirt, grime, or loose debris with mild soap and water. Use denatured alcohol to remove any residual grease or oil.
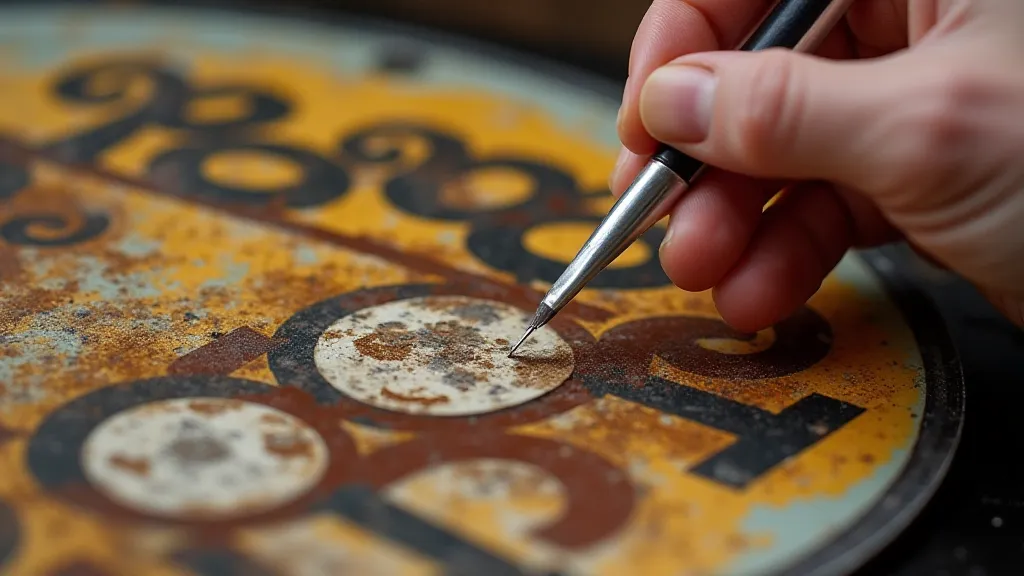
- Removing Loose Paint: Carefully remove any loose or peeling paint using a putty knife or scraper. Work gently to avoid damaging the surrounding original paint.
- Sanding: Lightly sand the edges of the damaged areas with fine-grit sandpaper. This helps create a smooth transition between the repaired area and the original paint. Start with 220 grit, then progress to 400, and finally 600 for a super smooth finish.
- Addressing Rust (if applicable): If the sign is metal and has rust, apply a rust converter or remove the rust mechanically (wire brush, sanding) before priming.
- Priming: Apply a thin, even coat of primer to the damaged area. Allow the primer to dry completely according to the manufacturer’s instructions. Priming helps ensure proper paint adhesion and provides a uniform base for the color coat.
- Color Matching: This is arguably the most challenging and crucial step. Try to find a paint that matches the original color as closely as possible. Consider the age of the sign - original paints often yellowed or faded. Sample the paint on a small, inconspicuous area to verify the match. Don’t be afraid to mix colors to achieve the right hue.
- Painting: Apply the new paint in thin, even coats. Multiple thin coats are better than one thick coat, which can be prone to cracking or running. Allow each coat to dry completely before applying the next. Use artist's brushes to match the texture of the original paint as closely as possible.
- Clear Coating (Optional): A clear coat can provide an extra layer of protection against UV damage and scratches. Choose a clear coat that is compatible with the paint and desired finish (gloss, satin, matte). Apply in thin, even coats.
Special Considerations for Different Sign Materials
The restoration process may need to be adjusted based on the material of the sign. Here’s a brief overview:
- Porcelain Signs: Porcelain is very durable but can be brittle. Be extra cautious when removing loose paint to avoid chipping.
- Metal Signs (Steel, Aluminum): Metal signs are prone to rust. Address rust issues thoroughly before painting.
- Cardboard/Masonite Signs: These signs are often very fragile. Use gentle cleaning methods and apply thin, flexible paint layers to prevent cracking.
- Plastic Signs: Ensure the primer and paint are compatible with the plastic material.
Maintaining Authenticity
The goal of restoring a vintage sign is not to make it look brand new but to preserve its character and authenticity. Here are some tips for maintaining the sign's vintage charm:
- Embrace Imperfections: Don't strive for absolute perfection. Minor imperfections and signs of wear add to the sign's history and charm.
- Match Textures: Pay attention to the texture of the original paint. Use brushes and techniques that replicate this texture as closely as possible.
- Avoid Over-Restoration: Resist the urge to completely remove all signs of wear. A little bit of weathering can add character and authenticity.
- Document Your Work: Keep detailed records of the restoration process, including materials used and techniques employed. This information can be valuable for future preservation efforts.
Conclusion
Repairing cracked or damaged paint on vintage record store signs is a rewarding process that requires patience, skill, and a deep appreciation for history. By following these guidelines and paying close attention to detail, you can restore these iconic pieces of music memorabilia to their former glory while preserving their authenticity and charm. Remember that each sign has a unique story to tell, and your restoration efforts should honor that story for generations to come.